
|
||
|
|
|
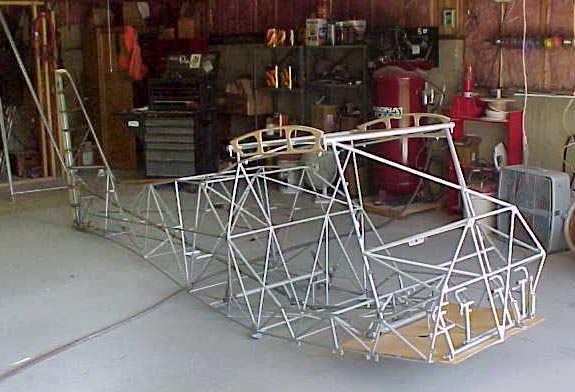
Building the Fuselage |
||
 On
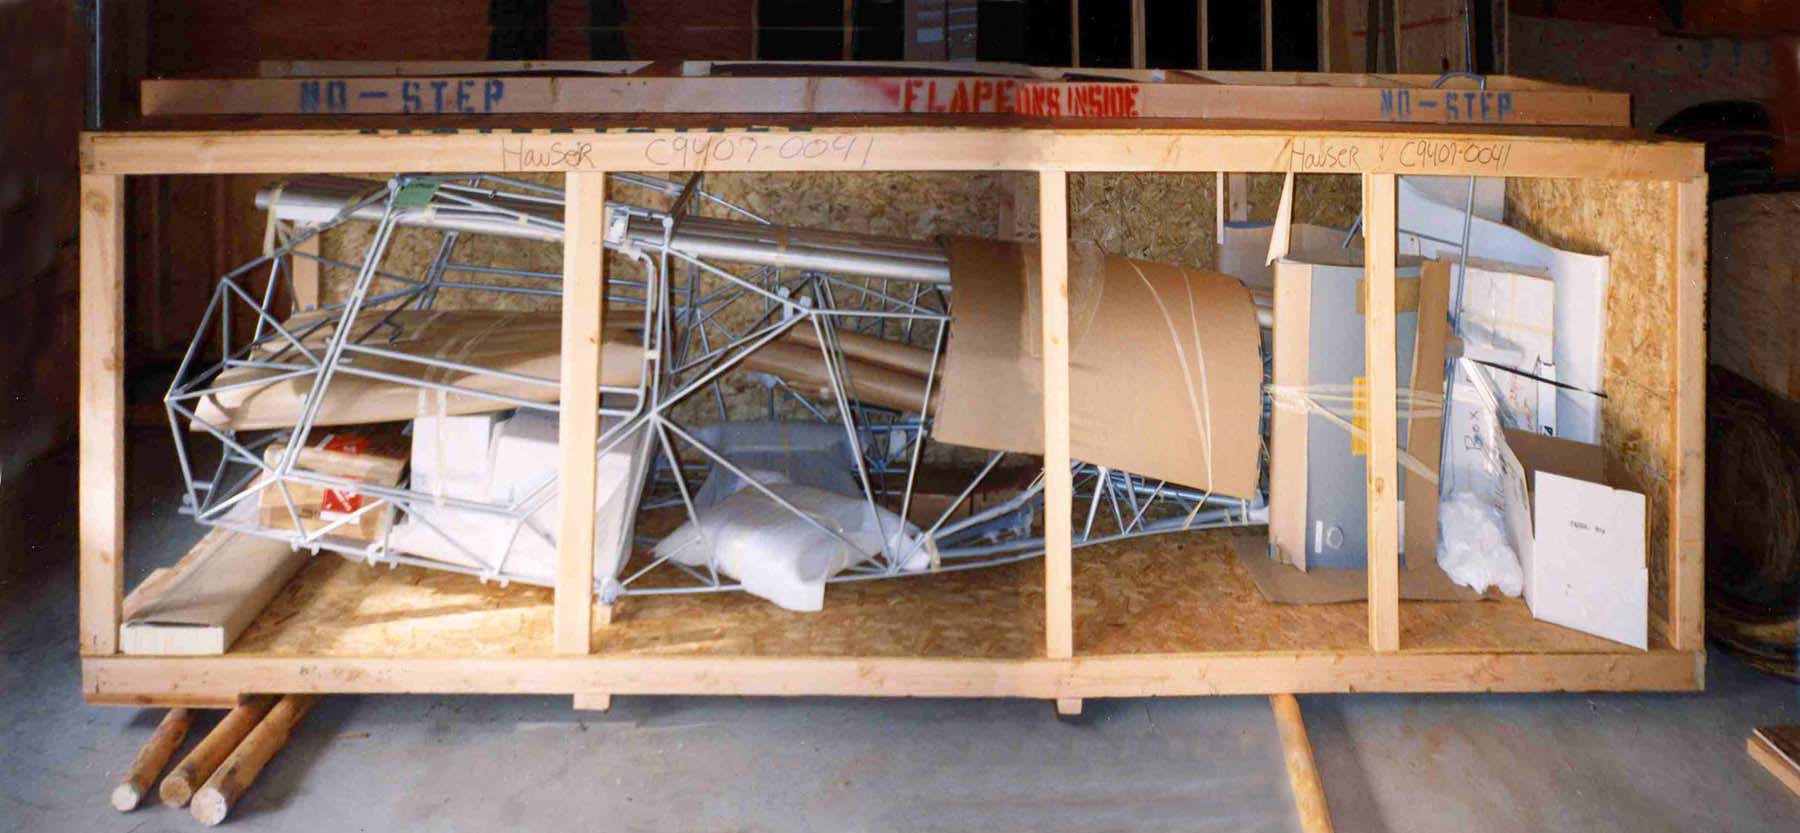
20. July 1994, together with my son, Robin, we "picked up" the freight
from the shipper and hauled it to my garage - eager to check everything
that awaited me
inside. Besides the considerable weight, I faced some space restrictions
which required careful maneuvering. By the way, yes, I had purchased a
large flat bed trailer so that I could haul the plane around now and then later
when it was finished. How would I ever know that the trailer would later come
in handy for hauling around all sorts of items like huge rocks and a
Bobcat tractor for a garden project! On
20. July 1994, together with my son, Robin, we "picked up" the freight
from the shipper and hauled it to my garage - eager to check everything
that awaited me
inside. Besides the considerable weight, I faced some space restrictions
which required careful maneuvering. By the way, yes, I had purchased a
large flat bed trailer so that I could haul the plane around now and then later
when it was finished. How would I ever know that the trailer would later come
in handy for hauling around all sorts of items like huge rocks and a
Bobcat tractor for a garden project!
|
||
|
The initial
momentum however, came to a temporary halt. I was beginning to feel like I
had been biting off too big a junk in too short a time. I started looking
for someone to help me and bring along the experience to do a professional job
so in that in the end I could finally
trust my plane - giving me the confidence that my life would be safe
while flying. Other more important events caused me to pause
until the summer of 1998 when Joan and I, under the guidance of an experienced
builder, Bill Ray, picked up where we had left off.
|
||
 The The
 first
steps were like warm up exercises - learning the names of
the tools, becoming familiar with working the glue properly, and tightening the nuts
and bolts just the right amount. first
steps were like warm up exercises - learning the names of
the tools, becoming familiar with working the glue properly, and tightening the nuts
and bolts just the right amount.
As an engineer, the hardest part for me to learn was that I did not have to apply so much precision when drilling and fitting pieces together, as the design tolerances were rather forgiving. |
||
 Most Most
 of
the small parts, wires and hoses were not laid out nor shown
in the building instructions. This is where the guidance of my mentor was
of value. In his large garage there were many boxes filled with parts I could
use for special projects. Soon I realized that my ambitions were rather high
when it came to selecting the equipment that would make the aircraft
tick. of
the small parts, wires and hoses were not laid out nor shown
in the building instructions. This is where the guidance of my mentor was
of value. In his large garage there were many boxes filled with parts I could
use for special projects. Soon I realized that my ambitions were rather high
when it came to selecting the equipment that would make the aircraft
tick.
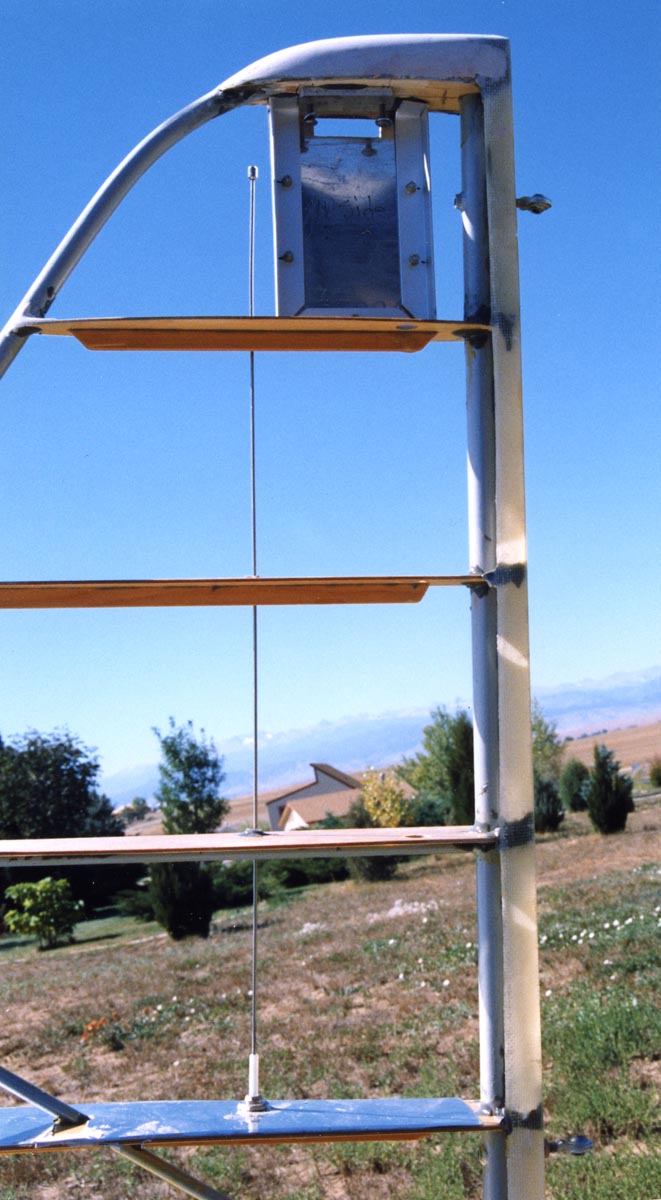
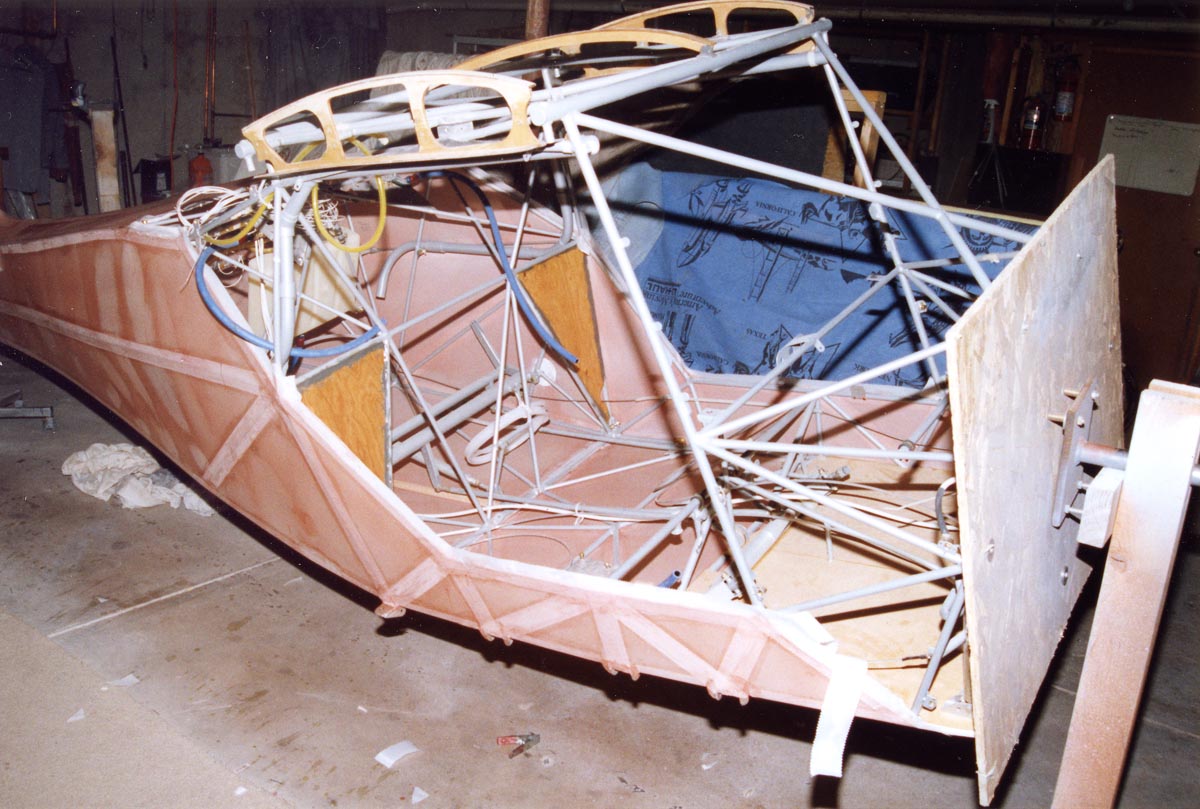
I could hardly wait to start with covering the tube frame but first had to decide which Avionics I was going to put in. Only then could I start to lay out the wires and create the antenna mounts. |
||
 |
 Where the forward part of the fuselage was rather spacious, things became rather narrow in the back. As the engine with the warp drive was going to pull the center of gravity forward, the heavy stuff had to be mounted in the back. Had I known that later on I would also want to add an oil cooler, I would have put additional weight in the back. Fortunately the ELT was rather heavy and I decided to install a sturdy tail spring and wheel. |
 |
 Then
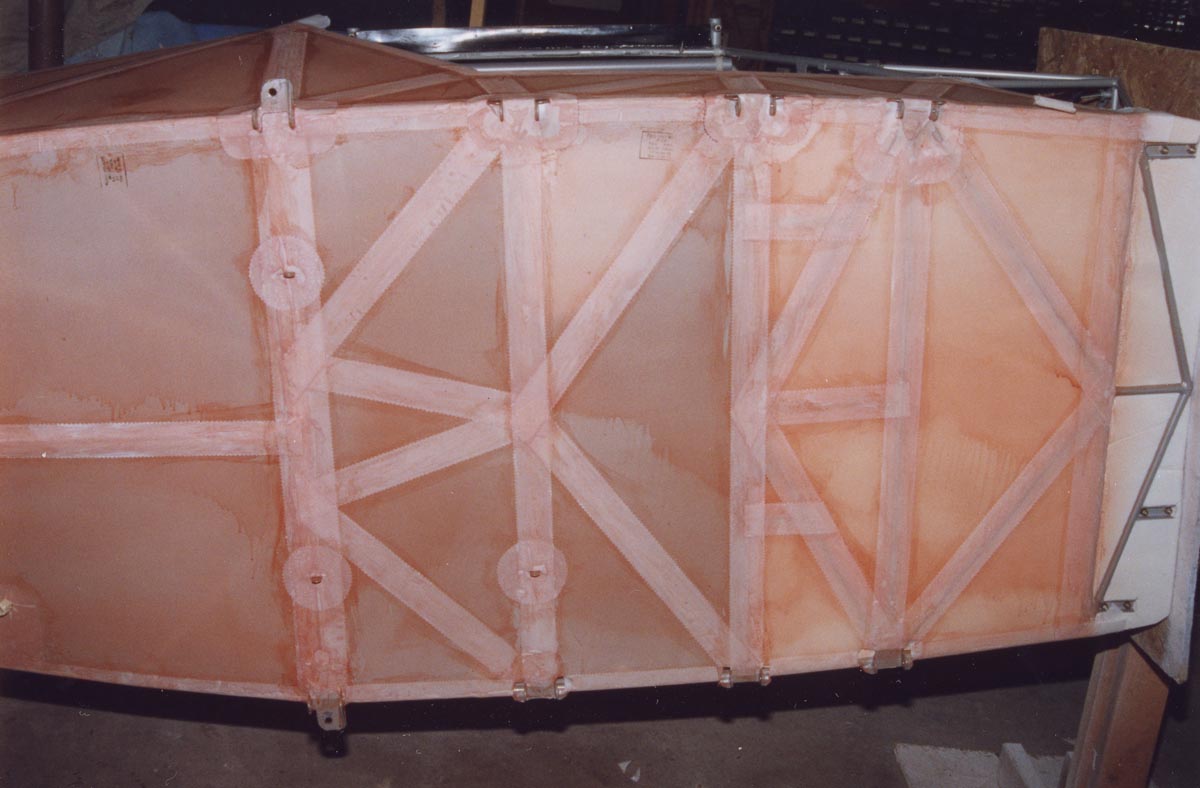
the day came when Joan and I learned to put on the fabric. It was a messy
job - all that glue called Polybrush which stuck on various points.
We had to work fast, as it was summer and Colorado east of the Rockies is
rather dry - the glue dried quickly and sometimes on the wrong surfaces,
like the gloves on your fingers. It was a real test of endurance when it
stuck to our skin............ Then
the day came when Joan and I learned to put on the fabric. It was a messy
job - all that glue called Polybrush which stuck on various points.
We had to work fast, as it was summer and Colorado east of the Rockies is
rather dry - the glue dried quickly and sometimes on the wrong surfaces,
like the gloves on your fingers. It was a real test of endurance when it
stuck to our skin............
Where the tubing was going to touch the fabric, reinforcement strips had to be added. The sides had to be properly secured and then heat tightened with the iron. After all of that, a diluted solution of Polybrush was sprayed on to tighten the fabric and remove all the wrinkles. |
||
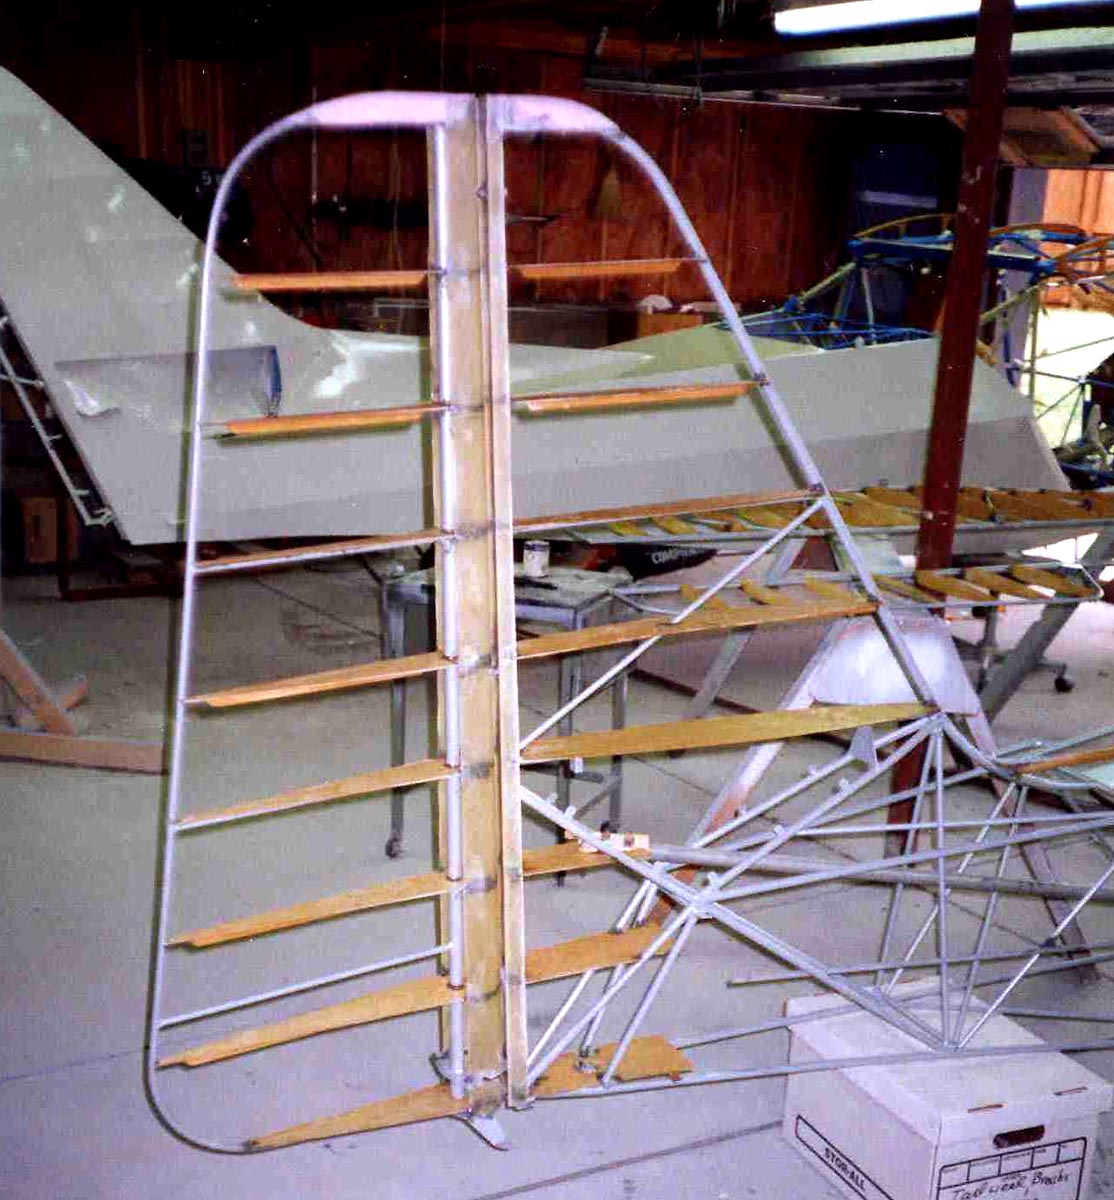
 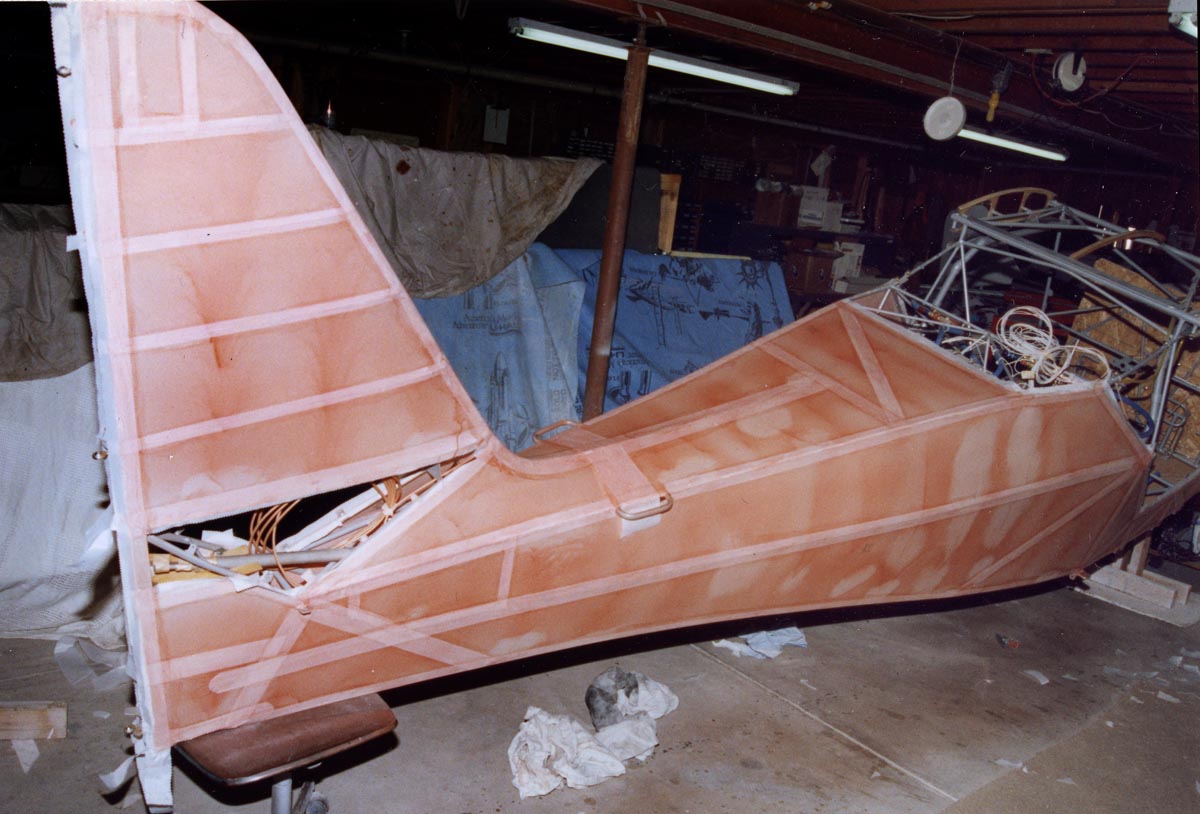 With
the front mounted on a pivot - the whole fuselage could be turned
around like a skewer. Slowly the fuselage assumed the look of an
aircraft. With
the front mounted on a pivot - the whole fuselage could be turned
around like a skewer. Slowly the fuselage assumed the look of an
aircraft.
The next part were the wings and the horizontal stabilizers. |
||
|
For further information select from the directory at the top right Contact address is [email protected] This page was last maintained 2.9.2008 |